Monday, December 31, 2012

Arkansas Crossroads - My First Modern Quilt

Finished quilt with borders will measure 60" by 80"
The inspiration for this quilt came from the December challenge by the Desi Quilters group:
1.Make any quilted item of any size
2.Use ONLY Black, White and ONE other colour. Fabric may be solid or prints.
The Arkansas Crossroads pattern first caught my attention on the Craftsy website (the block design seemed really simple) and I promised myself to make it one day. Well, here comes that day and I've decided to make a lap-sized quilt for my son, Siddhartha. I ordered a black & white charm pack from Keepsake Quilting which didn't arrive until last week which means I won't get the quilt done in time for the challenge deadline on December 31st, but I know Siddhartha will appreciate his quilt.
I picked out the white and gold fabrics and set to work.
Initially, the idea was to cut each 5" charm into four 2-1/2" squares to create the 16-patch square, but I quickly came to my senses and decided to use them as is and create 4-patch squares instead.
5" strips were cut from the white fabric and each strip was cut into 5" squares. And then another brainwave hit me. The alternate block in this pattern requires four white squares with half square triangles to be sewn to two opposite corners of each of the four squares. Instead, I decided to sandwich a 4-1/2" x 2-1/2" rectangle folded in half to create one-seam flying geese unit in each of the four seams on the block. So much less cutting and sewing!
All I had to do was to cut 4-1/2" strips from the gold fabric and cut again into 4-1/2" by 2-1/2" rectangles.
Each rectangle was folded in half and sandwiched between 2 white squares and pressed open to create a flying geese unit at the base. The seam on the back was pressed open. 


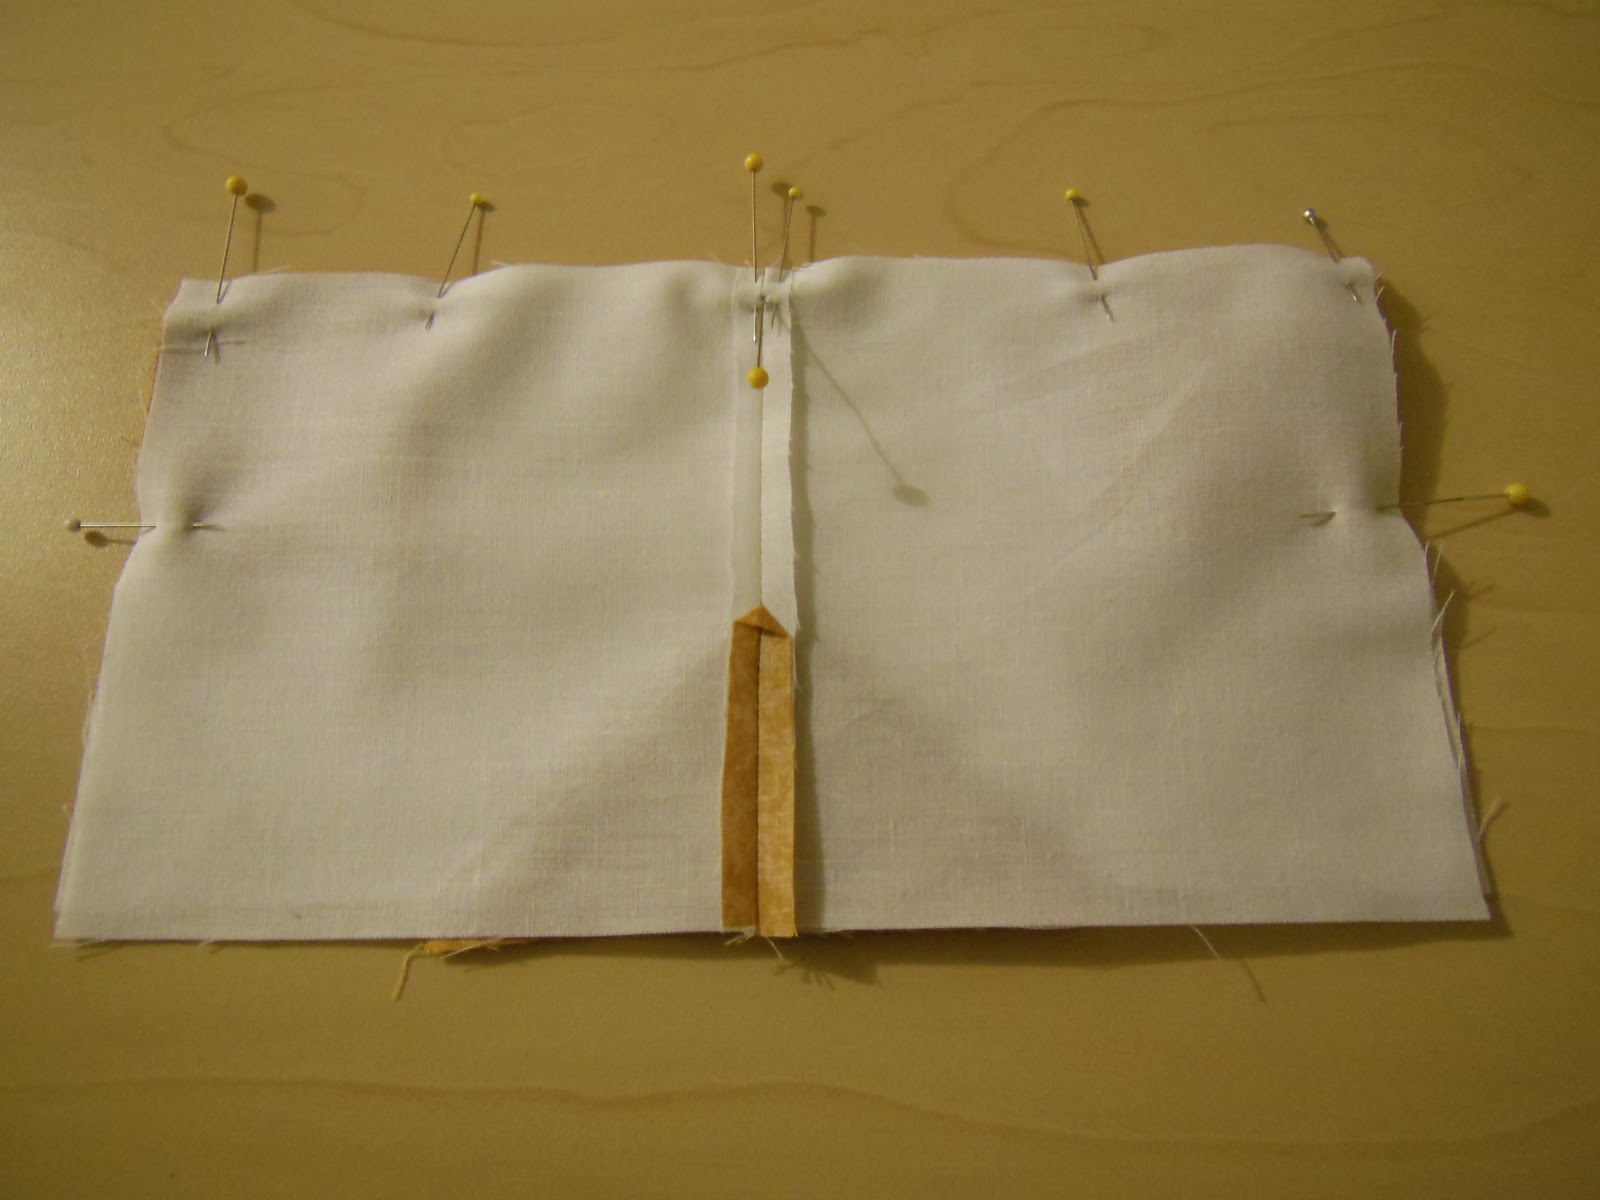
To create the 4 patch, a gold rectangle was folded in half, pinned between the top and bottom seams and sewn. The last seam on the 4-patch block was then pressed open.
The charm pack came with 50 black and white squares so I used all 50 squares + 2 black squares to make 13 black and white 4-patch units
and 12 white and gold crossroads units.
Since I've missed the deadline for the DQ December challenge anyway, I've ordered another package of black and white charms and plan to add two more rows to the length of the quilt.
Once the borders are attached, the finished quilt should measure approximately 60" x 80". I will present the finished quilt in a future blog.

Progress update.

Until then,
Cheers, everyone, and have a very happy New Year!


Saturday, December 8, 2012

Craftsy Block of the Month for May 2012

1. Modern Log Cabin Block


This Log Cabin block is supposed to be very improvisational.  There is no measuring or pre-cutting of strips.  The only suggestions were to skew the block so that the centre is framed and is off-centre.

Framing the center was easy.  I used a tulip fabric for the centre and chose to sew a narrow frame around it. 


To keep it off-center, I added narrow borders to the right and bottom of the centre block and added wider borders to the left and top of the centre block.  This was done to the second and fourth borders.

The finished size of this block measures 12-1/2" square.


2.  Wonky 5-Sided Log Cabin Block

This log cabin block is also improvisational and needs no measuring or pre-cutting of strips.


Rotated 180 degrees, it looks like a house!
In the beginning, there was a basket full of scraps.  The two suggestions were to create a wonky 5-sided log cabin block and to give it a scrappy look.


For the centre of the block, I chose to make a house which has 5 sides.  This was my first attempt at creating the 5-sided wonky log cabin block, but it was so small that I decided to frame it.
  

A second attempt to create a 5-sided block didn't succeed because the diagonal cut (green triangle at bottom right edge) was too small.  So I tried again.


For some odd reason, I found it really hard to keep from squaring up the block.  Notice the first time a wonky side was introduced, it was very soon after squared up so that the fifth side was lost.  The same thing is about to happen here.  So it's back to the scrap basket, as I try to finish up the block.


I usually try to maintain some order in the work place, but not so today.


The cutting table looks the worst.


Before attempting to create a truly wonky log cabin block, it looks like this mess will have to be cleaned up and order restored, which may help the brain to function better. Well, that never happened.

Instead I moved right on to creating that diagonal fifth side.  Here is tip #1.
To create that wonky side requires a (brave) deep cut spanning at least a couple of strips.


I realized that in order to maintain the diagonal edge, the two sides adjacent to it has to be trimmed  along its bias edge. This is tip #2.


And Here is tip #3.  When a strip is being added to this bias edge, the strip must be longer than the bias edge, so that it doesn't fall short of fabric when it's trimmed.

Having a bias edge on one side of the block didn't seem to do it, so I chopped off the adjacent edge. and created another wonky side.  And here's how the block ended up.  It finished at 12-1/2" square.


Now here's the really strange part of this entire exercise.  I ended up with a basket that has more scraps than when I began!  Don't ask me how that happened :)


Cheers & happy quilting!


Sunday, December 2, 2012

Sandy Quilt Block Drive - At the Finish Line

Voila!  I'm so excited to unveil my finished blocks for the Sandy Quilt Block Drive.


My 10 blocks and quilt label are ready to be shipped to the team leader.  She will turn the blocks into wonky log cabin blocks and then will use her longarm quilting machine to layer and finish the quilt.  Each quilt uses 42 blocks, so my 10 will be a small part of the whole quilt that will be presented to someone who needs it.

Each block finished at 10-1/2".


Vertical sashing strips were cut at 10-1/2 "L x 2-1/2"W.


The vertical strips were sewn to two opposite sides of each block and pressed away from the center of the block. Horizontal strips were then cut at 14-1/2"L x 2-1/2"W, sewn to the two remaining sides and pressed away from the center of the block.


The black borders make the center of the blocks pop!  Take a look at two blocks with and four without borders.


The other requirement was to provide the team leader with a 5" square quilt label which will be sewn to the back of the quilt.  I designed it on the computer. To use up the entire sheet of printer fabric, I created two labels. One will accompany my first 10 blocks and the other has been set aside for my next shipment.


Making these quilt blocks was a lot of fun and made a small dent in my stash of scraps.  It's going towards a good cause which adds to my sense of satisfaction. 

My hope is that you will be inspired to help out, too! 

Cheers!


Related Links: